Simple Buttercream Borders
Ever since I started decorating cakes, I have had this love affair with borders. I know that sounds strange, but I love looking at buttercream borders on cakes. To me, the border can really make a plain cake look special.
Since I don't do video, I want to share a couple of youtube channels where you can watch some very talented buttercream decorators. The first one is Liz Larson. Liz was a grocery cake decorator and shares a wealth of information on how to quickly pipe buttercream cakes. The other channel is Roland Winbeckler. Roland is a legend in the cake decorating world. He definitely does things old-school. He has a few buttercream tutorials on his channel that are well worth watching.
Since I don't do video, I want to share a couple of youtube channels where you can watch some very talented buttercream decorators. The first one is Liz Larson. Liz was a grocery cake decorator and shares a wealth of information on how to quickly pipe buttercream cakes. The other channel is Roland Winbeckler. Roland is a legend in the cake decorating world. He definitely does things old-school. He has a few buttercream tutorials on his channel that are well worth watching.
Shell Borders
One of the simplest and most common buttercream border is the shell border (or some variation). This border is done by holding your piping bag at about a 45 degree angle and letting your icing build up a bit before you ease the pressure and pull away.
Here is the shell border shown with a #18 tip and a #21 tip:
Shell border with #32 tip:
Shell border with #199 tip:
And with a #5 writing tip:
You see that the piping and pressure control are the same, but you get completely different looks depending on what tip is used.
Variations on the Shell Border
There are several things that can be added to a shell border to "jazz it up" a bit.
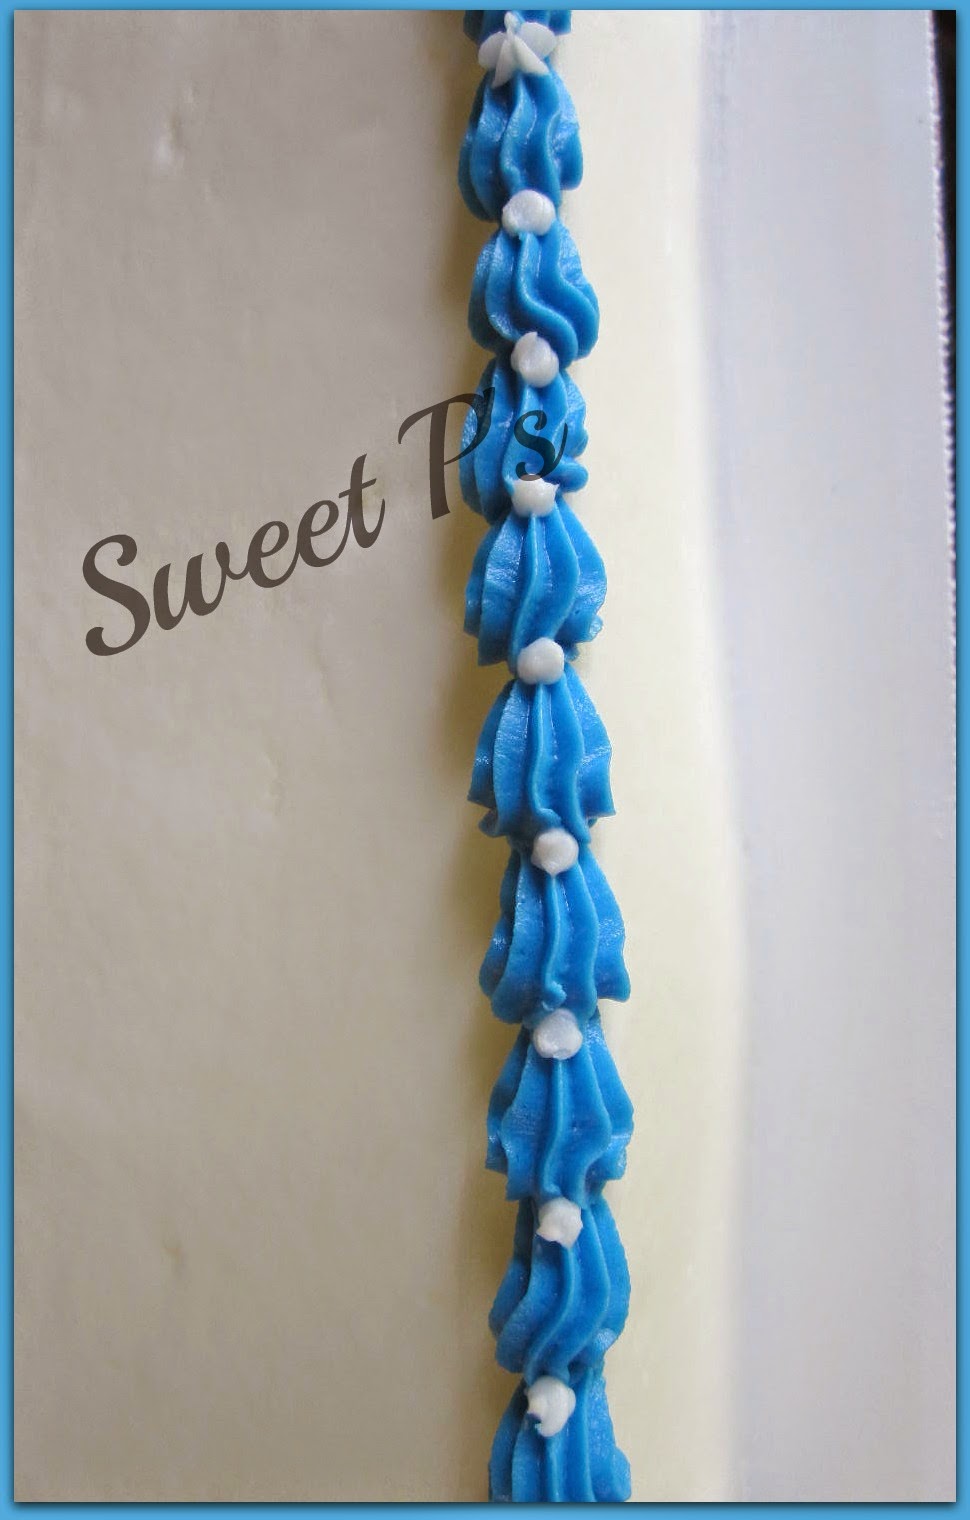
You can add a dot of a different color in between each shell
or you can add a star:
You can do what I refer to as the "over-under" which is a line piped with a writing tube that goes over a shell, then under the next one, then over, then under, etc. Then, go back to the first shell and reverse the order so that they criss cross:
This works really well when you have 3 main colors that you can carry through to the border:
One way to embellish a bottom shell border is to pipe simple arches above them and on the cake board. Here, I show a #199 shell border with arches piped with #18:
Once you are ready to move beyond the simple straight shell, try a reverse shell. Start by piping a shell where the "puff" is curved to the right:
Then pipe the next one with the puff in the opposite direction:
Repeat:
A variation of this is the double reverse shell. This is done by piping 2 puffs in one direction, then reversing:
To take this one step further, pipe another shell on top of the double so it looks like a triple shell:
Other types of Buttercream Borders
The rope border is well suited for a basketweave cake, a western or cowboy themed cake, nautical cake or masculine cake. I used a #32 to pipe this rope border. Start with a loose backward "S" shape:
Then, place the tip under the curve of the "S" and pipe over the tail of the 1st one:
Repeat:
Two very simple borders are the Zig-Zag and Puff borders. The zig-zag border on the top was piped with a #18 tip by keeping steady pressure and moving the bag back and forth along the top edge. The botton Puff border is piped with a #32. You make the zig-zag motion but start with easy pressure then build to heavy pressure in the middle and back to easy pressure to ease away.
The leaf tip #70 makes a very pretty ribbon like border. I made this border by using a shell-type motion but without building up a "puff".
The e-motion border is made pretty much how it sounds. Take a star-tip (in this case #14) and keep steady pressure while you pipe in a motion like a cursive "e".
You can add to this with a row of dots above and below the e-motion border:
Simple scroll design for sides:
This is one of the simplest scroll designs that I know of. Start by piping a wavy line. Make sure the waves are not too close together.
Then, pipe a backward "c" in each curve:
Then, go back over the "c" and use heavier pressure on the start of the "c":
Then, go back and pipe extra embellishments to fancy it up:
Examples:
Bottom Leaf ribbon border with dots - Top shell border:
Top Rope border - bottom shell border:
Top Over-Under border:
Bottom Puff border
Top border Reverse Shell:


Hi. I happened across your site and have had so much fun looking around. Thank you so much for your buttercream border post. It's great!
ReplyDeleteSimple and lovely.
ReplyDelete